On the Versatility of RecyclerView
RecylerView seems to be the go-to for displaying lists on Android. Of course there are other ways, and some are better than others for certain scenarios, but it’s generally a safe bet that RecyclerView will be a good option. Especially if the data you want to display is fairly complex, or if you want to display the same data in different orientations across your app.
A RecyclerView is built from a couple key components, the RecyclerView View object itself, a Layout Manager (of which there are 3 standard types, and of course, the option to create a custom type), and the Adapter used to bind the dataset to the RecyclerView.
The RecyclerView is so efficient because it recycles the ViewHolders that are used to display the data provided. The RecyclerView will keep a pool of empty ViewHolders, when one is needed it will populate it with data using onBindViewHolder() method in the adapter. When a ViewHolder is detached (scrolls beyond the users view), it gets added back to the pool of empty ViewHolders. You can use onViewRecycled() to do some actions when a ViewHolder is recycled, if the View contained a large image that can be set to null to reduce memory usage for example.
The ViewPager is another useful component of the Android framework that I had been reading up on recently. A ViewPager is a layout manager that allows the user to flip left and right through a series of tabs or pages, represented by Fragments, displaying different layouts and data in each.
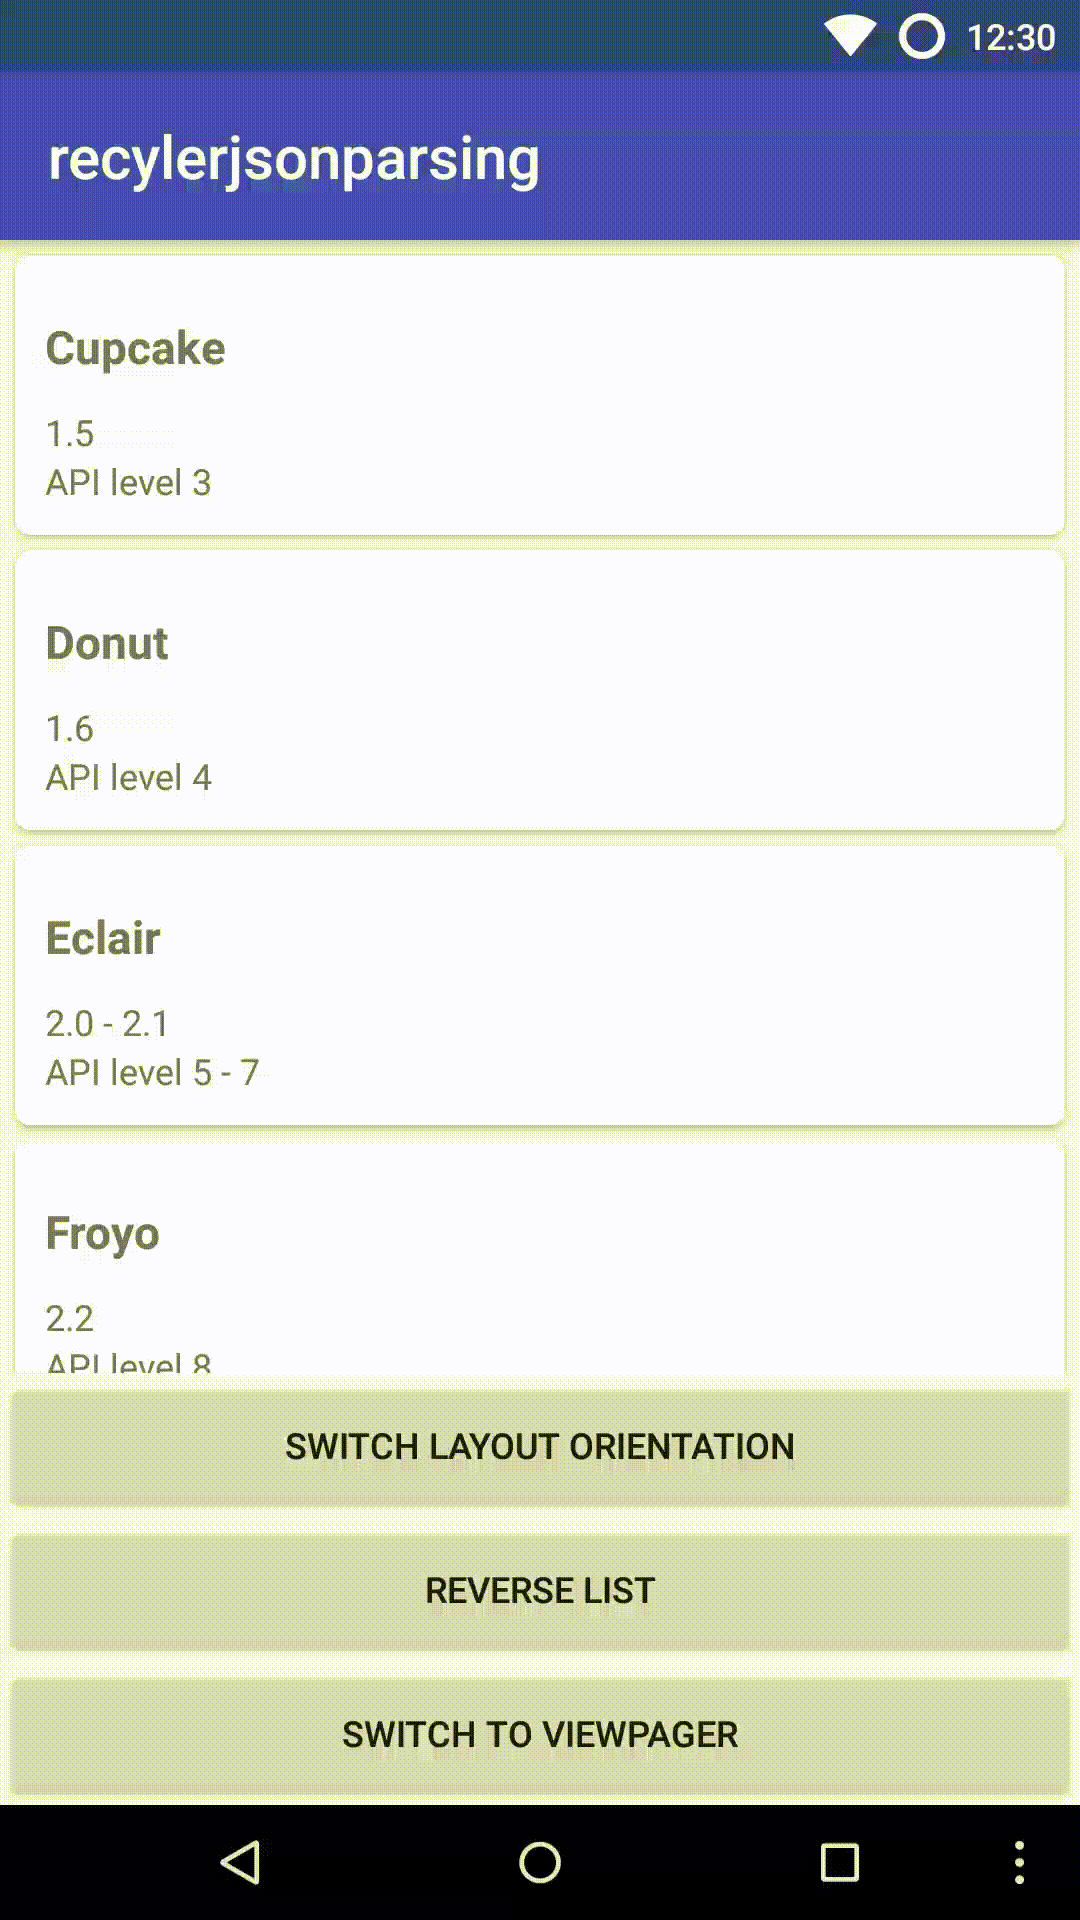
So I built a quick example app to play around with these two components. The app contains a MainActivity and a TabbedActivity which will hold the ViewPager. The data used was retrieved from http://api.learn2crack.com/android/jsonandroid using Retrofit, the JSON returned contains a list of the existing Android versions and their corresponding API levels.
In the MainActivity I implemented a standard RecyclerView using a LinearLayout. LinearLayoutManager allows for two different orientations, horizontal, and vertical. The orientation is passed in as a parameter when creating the LayoutManager. I added a button to toggle between the two orientations. To change the orientation it will inspect the current LinearLayoutManager for the RecyclerView using the getOrientation() method. If the orientation is horizontal it will create a new LinearLayoutManager with the vertical orientation and set the RecyclerView’s LayoutManager to the new instance, and if the orientation is vertical it will do the same thing with a new horizontal LinearLayoutManager.
//Initialize switchLayoutbutton
switchLayoutButton = (Button) findViewById(R.id.switch_layout_button);
switchLayoutButton.setOnClickListener(new View.OnClickListener(){
    public void onClick(View v) {
        // Switch layout orientations

        LinearLayoutManager linearLayoutManager = (LinearLayoutManager) recyclerView.getLayoutManager();

        if(linearLayoutManager.getOrientation() == LinearLayoutManager.VERTICAL) {
            RecyclerView.LayoutManager layoutManager = new LinearLayoutManager(getApplicationContext(), LinearLayoutManager.HORIZONTAL, false);
            recyclerView.setLayoutManager(layoutManager);
        } else {
            RecyclerView.LayoutManager layoutManager = new LinearLayoutManager(getApplicationContext(), LinearLayoutManager.VERTICAL, false);
            recyclerView.setLayoutManager(layoutManager);
        }
    }
});
You can also reverse the list of items in the layout using the setReverseLayout() method. I added a button to the MainActivity that will do this.
//Initialize reverseLayoutButton
reverseLayoutButton = (Button) findViewById(R.id.reverse_layout_button);
reverseLayoutButton.setOnClickListener(new View.OnClickListener(){
    public void onClick(View v) {
        // Switch layout orientations
        LinearLayoutManager linearLayoutManager = (LinearLayoutManager) recyclerView.getLayoutManager();

        if(linearLayoutManager.getReverseLayout()) {
            linearLayoutManager.setReverseLayout(false);
        } else {
            linearLayoutManager.setReverseLayout(true);
        }
    }
});
This is really just the tip of the iceberg when it comes to RecyclerView. All of this is done using a single type of LayoutManager, the LinearLayoutManager.
In the other activity in my app, TabbedActivity, I set up a ViewPager with 3 tabs containing a RecyclerView with a different layout in each. The tabs are represented by a Fragment in the ViewPager, and since each tab in this example will contain the same RecyclerView we can share the same Fragment class. When the user switches tabs the getItem() method of the ViewPager’s FragmentPagerAdapter is called to return the new instance of the Fragment that needs to be displayed. To create a different layout based on the tab we can pass an argument to the new instance of the Fragment and use that to determine which LayoutManager to be used on the RecyclerView. In my example I set up some constants, 0-2, to represent the 3 tabs, and used a switch statement in the onCreateView() method where the LayoutManager gets set.
recyclerView = (RecyclerView) rootView.findViewById(R.id.card_recyler_view_pager);
recyclerView.setHasFixedSize(true);

// Check to see what the layout type should be and create the necessary LayoutManager
switch(layoutType){
   case FRAGMENT_LINEAR:
       RecyclerView.LayoutManager layoutManager = new LinearLayoutManager(getActivity(), LinearLayoutManager.VERTICAL, false);
       recyclerView.setLayoutManager(layoutManager);
       break;
   case FRAGMENT_GRID:
       GridLayoutManager gridLayoutManager = new GridLayoutManager(getActivity(), 3);
       recyclerView.setLayoutManager(gridLayoutManager);
       break;
   case FRAGMENT_STAG_GRID:
       StaggeredGridLayoutManager staggeredGridLayoutManager = new StaggeredGridLayoutManager(3, StaggeredGridLayoutManager.VERTICAL);
       recyclerView.setLayoutManager(staggeredGridLayoutManager);
       break;
}
The other two LayoutManager types are GridLayoutManager and StaggeredGridLayoutManager. These are pretty self-explanatory. The GridLayoutManager will show our CardView items in a grid of columns, the number of which is set with a parameter in the constructor (3 in this example). The StaggeredGridLayoutManager is similar in that is will display a grid of the CardView items but they do not have to be of uniform size, each cell will only be as big as required to fit the data contained in it. This can create some odd spacing when you get to the bottom, this can be handled with the setGapStrategy() method, depending on how you want the content displayed if this is an issue with your particular dataset. This can happen when the data in each cell varies a lot in size.
One thing to note is that the ViewPager by default will also load the tab before and the tab after the currently selected tab. This improves scrolling performance. You can see this in action if you scroll quickly from the Linear, to the Grid, and then to the Staggered tab in the example app. Scrolling from Linear to Grid is fine, the RecylerView in the Grid tab is already loaded with data from the network call. When we quickly scroll from the Grid to the Staggered tab the RecyclerView is not yet hydrated with data and it takes a second for the data to appear.
The code for this example app can be found here